DIY doily collar {easy sewing tutorial}
I've really been leaning toward easy projects lately. It's hard when you're juggling kids that don't nap anymore and the house and piece of work and church and all your other responsibilities to find time for a really involved project – and if you do brand time and (heaven forbid) IT DOESN'T WORK, then you feel bad because all that time was a complete waste. (Ok, and so it'due south never really a waste a time when you're doing something interesting or creative – but information technology certain feels that way sometimes.)
But with quick projects, it'south easier to just experiment and not feel besides bad if things don't piece of work out. And when they do, well so you tin be doubly proud of yourself for making something cool in practically no fourth dimension at all! That'southward how I experience nigh today's DIY doily collar. It was quick, simple, and turned out absolutely adorable.
Heres the easy sewing tutorial showing how to add a DIY doily collar to a shirt or sweater:

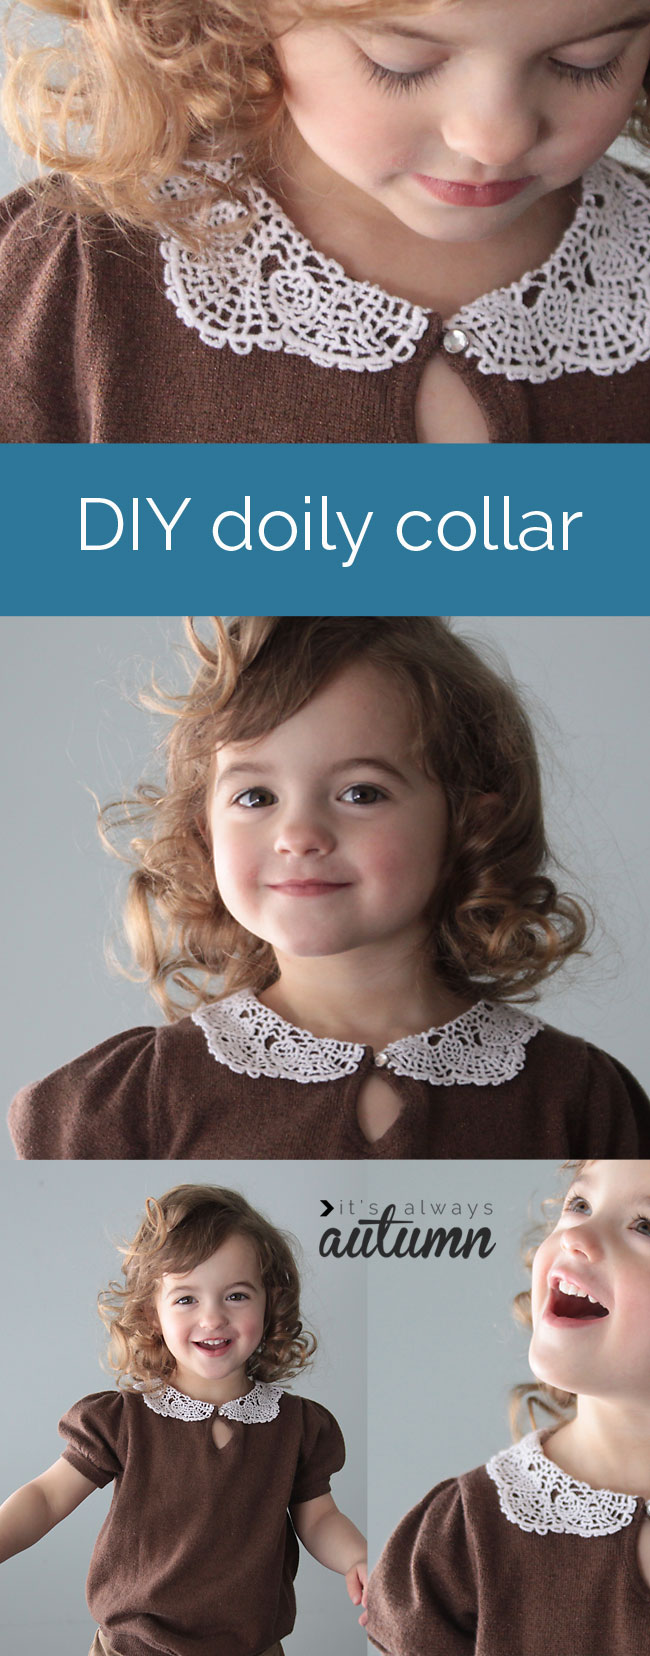
Start with a shirt and a doily that'due south almost one-half as wide as the front neckline. NOTE: when you sew the doily onto the shirt it will eliminate some of the stretch in the front half of the neckline. Brand certain your shirt either has a button opening or volition still fit over the wearer's head with limited stretch.

1 – kickoff by slicing the doily exactly in half with a rotary cutter or scissors. 2 – Identify the doily forth the neckline of the shirt, folding over the top one-half inch or so inside the neckline. Because the neckline curves and the cut edge of the doily is directly, yous'll have to fold over more of the doily in the heart than at each end. Fiddle with information technology until information technology lays nicely. 3. Carefully flip the doily up, and pin the portion that was folded over to the inside of the neckline. 4. Apply a zig zag run up very close to the edge of the shirt's neckline to sew the doily to the inside of the shirt. five. Flip the doily back downward, and hand stitch it downwardly in a couple of places to make sure it lies flat. vi. Finished.
I don't know if doilies shrink at all when done, so I did wash mine first (I'm guessing nearly that you buy at the shop now would not shrink, but better condom than sorry). I found my doily at Joann Fabrics and it was $5, which I thought was pricey for how tiny it is, just with a coupon it was under $iii, and that seemed a minor price to pay for the added cuteness.

People occasionally mention to me that it seems like my girl really enjoys being photographed. Actually, she really enjoys NOT looking at the camera and spinning effectually when I ask her to stand still. But three or 4 m&ms become a long mode toward groovy photos. (Find tips on photographing toddlers here and hither.)

linked at: Make information technology and Love it, I Center Naptime, Whipperberry, Tidy Mom
Reader Interactions
armstrongraceiziendas1939.blogspot.com
Source: https://www.itsalwaysautumn.com/diy-doily-collar-easy-sewing-tutorial.html
0 Response to "DIY doily collar {easy sewing tutorial}"
Post a Comment